

Key Takeaways
- Service reports use color-coded or numeric condition ratings that indicate urgency — knowing the scale helps you prioritize repairs.
- Labor time is billed in flat-rate hours set by manufacturer guides, not necessarily the actual time spent.
- OBD-II fault codes on a report point to a system, not always a single definitive part to replace.
- Declined services are noted on reports partly to protect the shop legally and to keep you informed.
- Cross-referencing a report with your owner's manual helps verify whether a recommended service is actually due.
What you will need
Why Service Reports Feel Confusing
A standard mechanic's service report is designed primarily as an internal shop document — a record for technicians, warranty administrators, and liability purposes. Consumer-readability is rarely a design priority. The result is a page dense with abbreviations, part numbers, flat-rate codes, and inspection checkboxes that can feel impenetrable to anyone outside the industry.
Understanding the document matters because it directly affects the decisions you make — and the money you spend. Misreading a yellow-rated item as urgent can lead to unnecessary repairs; ignoring a genuinely red-rated safety item can put you at risk. The vehicle service schedule and the inspection report are related but different: the schedule tells you what's due by mileage or time; the inspection report tells you what a technician actually observed during your visit.
What you will need
This guide walks through the six core elements of a typical service report so you can read one confidently and ask the right questions before authorizing any work.
What the Report Is Actually Measuring
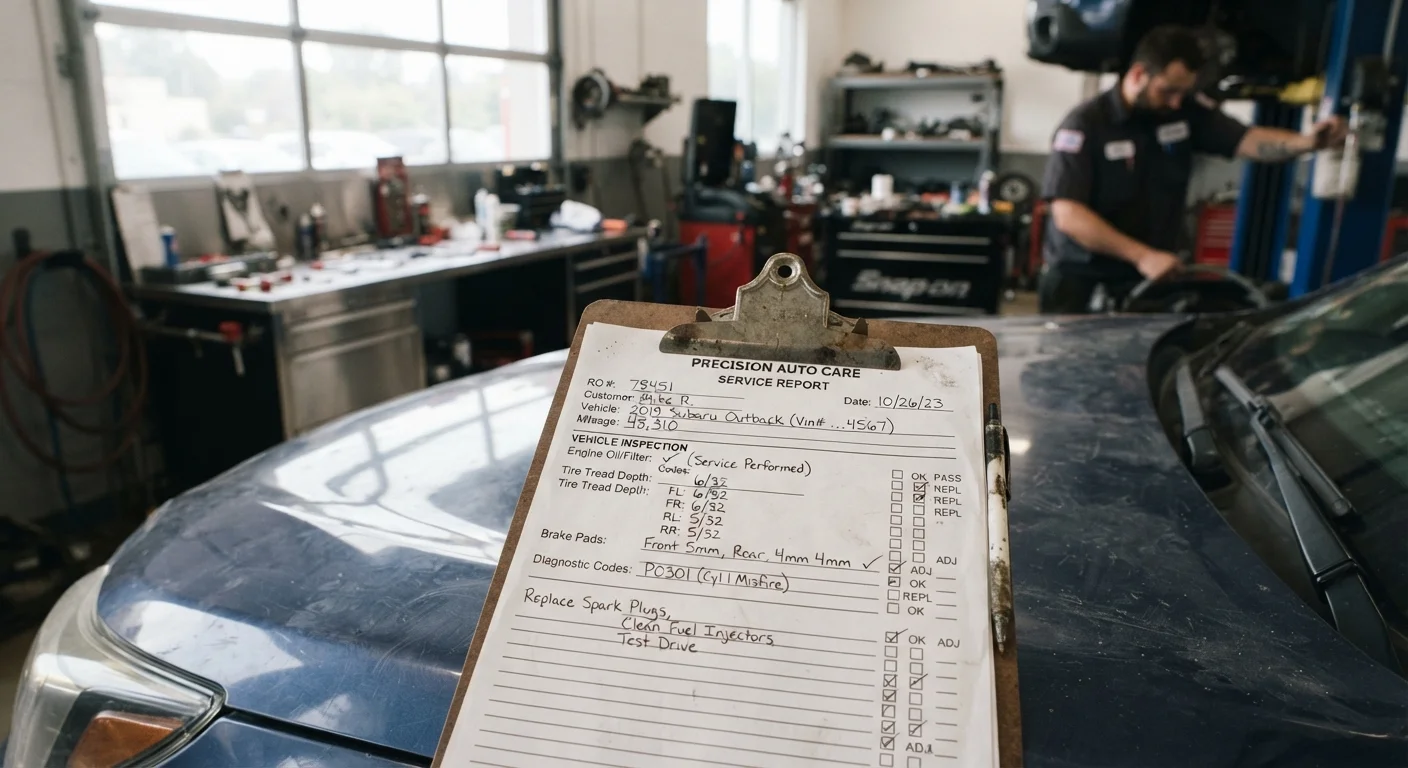
Behind every rating on a multi-point inspection is a physical measurement or observation. Brake pad thickness, tire tread depth, fluid color and pH, belt condition, and hose firmness all have industry-accepted service thresholds. When a technician marks a component yellow or red, that mark should correspond to a recorded figure — not a judgment call. Shops that document measurements give you objective data you can evaluate independently.
Red-Rated Items Are Not Optional
When a multi-point inspection marks a component — such as brake pads or a tire — as red or "immediate attention required," driving on that vehicle may be unsafe. These ratings are not upsells; they reflect measurements or observations the technician recorded. Have a qualified mechanic evaluate any red-rated item promptly.
Fluid condition is one area where ratings are more subjective. Automatic transmission fluid, for example, is evaluated partly by color and smell. If a report flags your transmission fluid as degraded, it's reasonable to ask what specific indicator prompted that assessment.
Keep Every Service Report
Storing your service reports — even digitally — creates a maintenance history that can help a future mechanic diagnose recurring issues faster. It also adds credibility when selling the vehicle, since you can demonstrate documented upkeep. Many shops now email digital copies automatically.
For a broader picture of how to keep tabs on your vehicle's health between shop visits, the owner's manual remains the most authoritative reference for your specific vehicle's tolerances and service requirements. And if you're weighing whether to handle certain maintenance yourself, a comparison of DIY versus professional service can help you decide what's appropriate for your skill level.
Don't Sign Blindly — Ask First
A service report or estimate becomes an authorization once you sign it. Before approving any work, confirm which items are safety-critical versus routine. If something is listed as urgent but you don't understand why, ask the service advisor to explain it in plain language before work begins.
After the Visit: What to Do With the Report
Once you're home, take five minutes to file the report with your vehicle records. Note any yellow-rated items and set a calendar reminder to reassess them at your next oil change interval. If fault codes were listed, cross-reference them with your vehicle's VIN-specific repair history if you have access to one — some codes recur due to a known design issue on a particular model year.
Finally, compare the report's recommended services against what your service schedule actually calls for at your current mileage. Not every service a shop recommends will align exactly with the manufacturer's own intervals. Understanding the difference helps you make informed decisions rather than reactive ones.
Identify the document type you're reading
A shop may hand you several different documents. A repair order (sometimes called a work order) lists specific jobs already authorized or completed. A multi-point inspection sheet (MPI) is an overall vehicle health check, usually provided at no charge alongside an oil change. An estimate is a cost projection for proposed work. Knowing which document you're holding tells you whether it describes completed work, flagged issues, or pending costs.
Decode the condition rating system
Multi-point inspections almost always use a traffic-light scale: green means acceptable condition, yellow (or amber) means monitor or service soon, and red means immediate attention required. Some shops use a 1–3 or 1–4 numeric scale instead. The threshold for each color is typically tied to measurable values — brake pad thickness in millimeters, tire tread depth in 32nds of an inch, or fluid condition on a test strip.
Understand labor time and flat-rate billing
The hours listed beside a labor charge come from a flat-rate guide — an industry-standard reference that assigns a set number of hours to each job type, regardless of how long the technician actually takes. A brake pad replacement might carry a flat rate of 1.5 hours whether it takes 45 minutes or two hours. This system is standard across the industry, not specific to any shop. The labor rate (cost per flat-rate hour) varies by region and shop type.
Look up any OBD-II fault codes listed
If your car triggered a check engine light, the report may include a Diagnostic Trouble Code (DTC) — a five-character code beginning with a letter (P for powertrain, B for body, C for chassis, U for network). The code identifies which system reported an issue, not necessarily the exact failed component. For example, a P0420 code points to catalyst efficiency below threshold — it could relate to the oxygen sensor, the catalytic converter, or an exhaust leak. A proper diagnosis involves additional tests beyond simply reading the code. See also what warning lights mean for context on how codes relate to dashboard alerts.
Review declined services and notes
Most repair orders include a declined services section — items the shop recommended but you or a previous owner chose not to do. These carry a date and mileage stamp. This section matters because it documents that you were informed, which can affect warranty decisions and liability. Review declined items from prior visits to see if any are now overdue. Cross-check them against your owner's manual maintenance schedule to assess urgency.
Verify parts listed and confirm warranty coverage
Parts on a repair order should be listed with a part number and a unit cost. Note whether parts are described as OEM (Original Equipment Manufacturer — made to factory spec), OES (Original Equipment Supplier — same supplier as OEM but sold aftermarket), or aftermarket (third-party manufactured). Each tier carries different pricing and, typically, different warranty terms. Most shops offer a separate labor warranty — often 12 months or 12,000 miles — distinct from the parts warranty. Confirm both in writing before you leave.